How to Use Liquify Effect in Procreate: Expert Techniques Revealed
One of the famous features of Procreate, today we bring to you a detailed tutorial on how to liquify in Procreate. Procreate is one of – if not the single – most popular apps designed for digital painting on iOS and/or iPad OS.
Procreate will run only on iPads or Apple phones, so if you want a designing app for your Windows in can have a look at alternatives of Procreate for Windows.
It’s been around since 2011, a lot more than most other painting apps, and launched more than four years before the release of the first-generation Apple Pencil. The developers – Savage Interactive – clearly put a lot of thought, love, and care into this product.
More than 10 years since its release, it’s still seeing regular updates, features, and changes. It’s relatively cheap, a one-time payment of 10 USD, compared to Adobe Fresco’s monthly 10 USD subscription. And Procreate is still one of the most well-thought-out and fully-featured digital painting apps on the market, as every digital painting app reviewer will tell you.
There are a lot of professional artists that proudly use Procreate and don’t feel the need to hide it. For a long time, there was a stigma against portable consumer products like the iPad in the professional field.
People would scoff and dismiss anything that wasn’t a 1500 USD Wacom Cintiq Pro. But now, times have changed, and cheaper consumer tablets have grown more powerful, accurate, and seamless. And Procreate grew naturally with this growth in power. Moreover, the time-lapsing feature makes Procreate worth buying.
With the many UI and design changes over the years, it’s no wonder that Procreates also added new sections containing new elements. One of these sections or panels is the “Adjustments” section, over at the top left, next to the spanner that signifies settings.
The icon for this section seems to be a magic wand with a sparkle next to it. Under this panel, there are many options and settings for anyone looking to add interesting effects to their work.
Of course, there’s the H/S/B adjustment, color balancing, and blurs, but there are also some interesting effects like bloom, glitch, halftone, and chromatic aberration. What we’re looking for is in the bottom subsection, though; Liquify and Clone.
How to Liquify in Procreate
Most of the other effects in this section function by applying their advertised effect and letting you control various parameters by swiping horizontally or vertically. Not Liquify, this tool works somewhat like all the other brushes in the paint, smudge, and erase tools.
You want to use your finger or the Apple Pencil – whichever you have it configured to use – just to draw like you ordinarily would, except this time you’ll be manipulating the painting. Not only liquefy, but you can also create wonders with glazed brushes, and effects like Mandala. You can also design the background and play with multiple layers.
Firstly, you’ll want to choose which shape you want to liquify according to. This can be anything from “push,” “twirl right,” “twirl left,” “pinch,” “expand,” “crystals,” “edge,” or “reconstruct,” with two more options at the end “adjust” and “reset.” These last two might appear grayed out, but that’s because they only come into play once you’ve started using the effect.
“Push” does what it says on the lid. You can push the strokes of whatever layer(s) you’ve selected around and modify it however seems best to you. This one is the most basic, easiest to grasp, and easiest to use. It’s also probably the most versatile because the rest of the shape effects can be replicated with just a “push.”
“Twirl right” and “Twirl left” are also pretty self-explanatory, you hold on a point and it will twirl or spin the colours around that point clockwise or counter-clockwise respectively. This is really useful for many types of projects, but I use this the most on is psychedelic backgrounds and imagery.
“Pinch” and “Expand” are opposites of each other. “Pinch” will draw the colours around it towards itself in a straight line as if the painting is on cloth and someone pinched the cloth at that one point. “Expand” does the opposite and pushes the colours around it outwards in a circular pattern.
Both of these are very useful in painting underwater surfaces when viewed from outside the water, and also really useful for backgrounds. From my experience, “pinch” and “expand” are best used in tandem together so as to make a cohesive piece.
“Crystals” is where things start to get really interesting. This one is actually pretty rare since I haven’t seen this type of liquification in any other software I’ve used, or at least not under the same name.
Under this effect, the surrounding pixels sort of move outward unevenly in a form of a zig-zag pattern, almost giving the appearance of small shards or ‘crystals.’ This can be really useful to give a surface a fuzzy effect, or present small strands of hair or fur.
But one interesting effect that this type of liquification can help achieve is a rippling or wave-like effect on clear water’s surface. If you paint rapidly oscillating left-right over a surface, it gets a ripple-like effect rather than the intended crystal shard-like effect.
“Edge” is almost like “pinch” but instead just pulls in the surrounding pixels to a line instead of a point, almost seeming to fold two parts of the painting together. Almost as if the painting is cloth and someone pressed the edge of a thin rigid surface into it. This one can lead to some very interesting results.
“Reconstruct” is again a bit self-explanatory. It just removes the liquefication effect over whatever you run it on. For example; if you liquified something and it looks perfect, but is spilling over onto a nearby hard edge, you can draw with “reconstruct” over that edge and it will correct any liquefication at that point without messing with the rest of the image.
“Adjust” can allow you to mess with the strength of the effect you’ve applied. Keep in mind that this option only shows up once you’ve applied some liquification. “Reset” just resets all applied liquify effects and completely undoes everything until the point where you started liquifying.
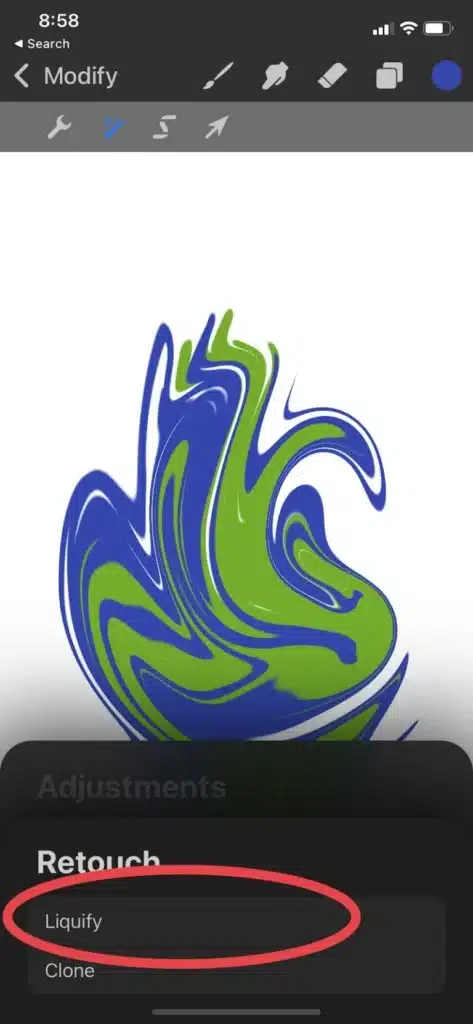
For better understanding, check the following screenshots to learn how to Liquify in Procreate step by step:
FAQs
-
Where is the option for Liquify in Procreate?
The option for Liquify can be easily found in the drop-down menu of ‘Adjustments’ at the top left part of the screen in Procreate. It will be available right above ‘Clone,’ another helpful tool.
-
Can Liquify be performed on multiple layers in Procreate?
Yes, Liquify can be performed on multiple layers of your project. You need to select the layers you would like to choose from the layers option on the top right part of the screen and use Liquify.
-
How to perform Liquify on multiple layers in Procreate?
Click on the layers tab on the top right part of the screen. A drop-down menu for the layers you created will appear. Check the tickboxes for the layers you want to use Liquify on, and go crazy.
-
Which parameters are available in Liquify in Procreate?
There are four parameters available to modify your brush according to your needs: size, pressure, distortion, and momentum.
-
What are the different features/modes available under Liquify in Procreate?
There are a total of 10 features/modes available under Liquify: Push, Twirl Right, Twirl Left, Pinch, Expand, Crystals, Edge, Reconstruct, Adjust, and Reset. Adjust and Reset might be greyed out since they can only be used once an effect has been applied.
Procreate can also provide you with faster art and stacking tools. You simply need stronginternet and an optimum battery to create amazing designs. Since the four parameters (size, pressure, distortion, momentum) are pretty self-explanatory with their titles, and since you’d only really understand and get the hang of it once you play around with them, I’ll leave that out of this article.


